Participate in the Beta Test!
Your help is invaluable in helping us improve the application. If you encounter a bug, display issue, or any other anomaly, please share your feedback with us.
Please fill out the online form by clicking on the link below:
Access feedback form
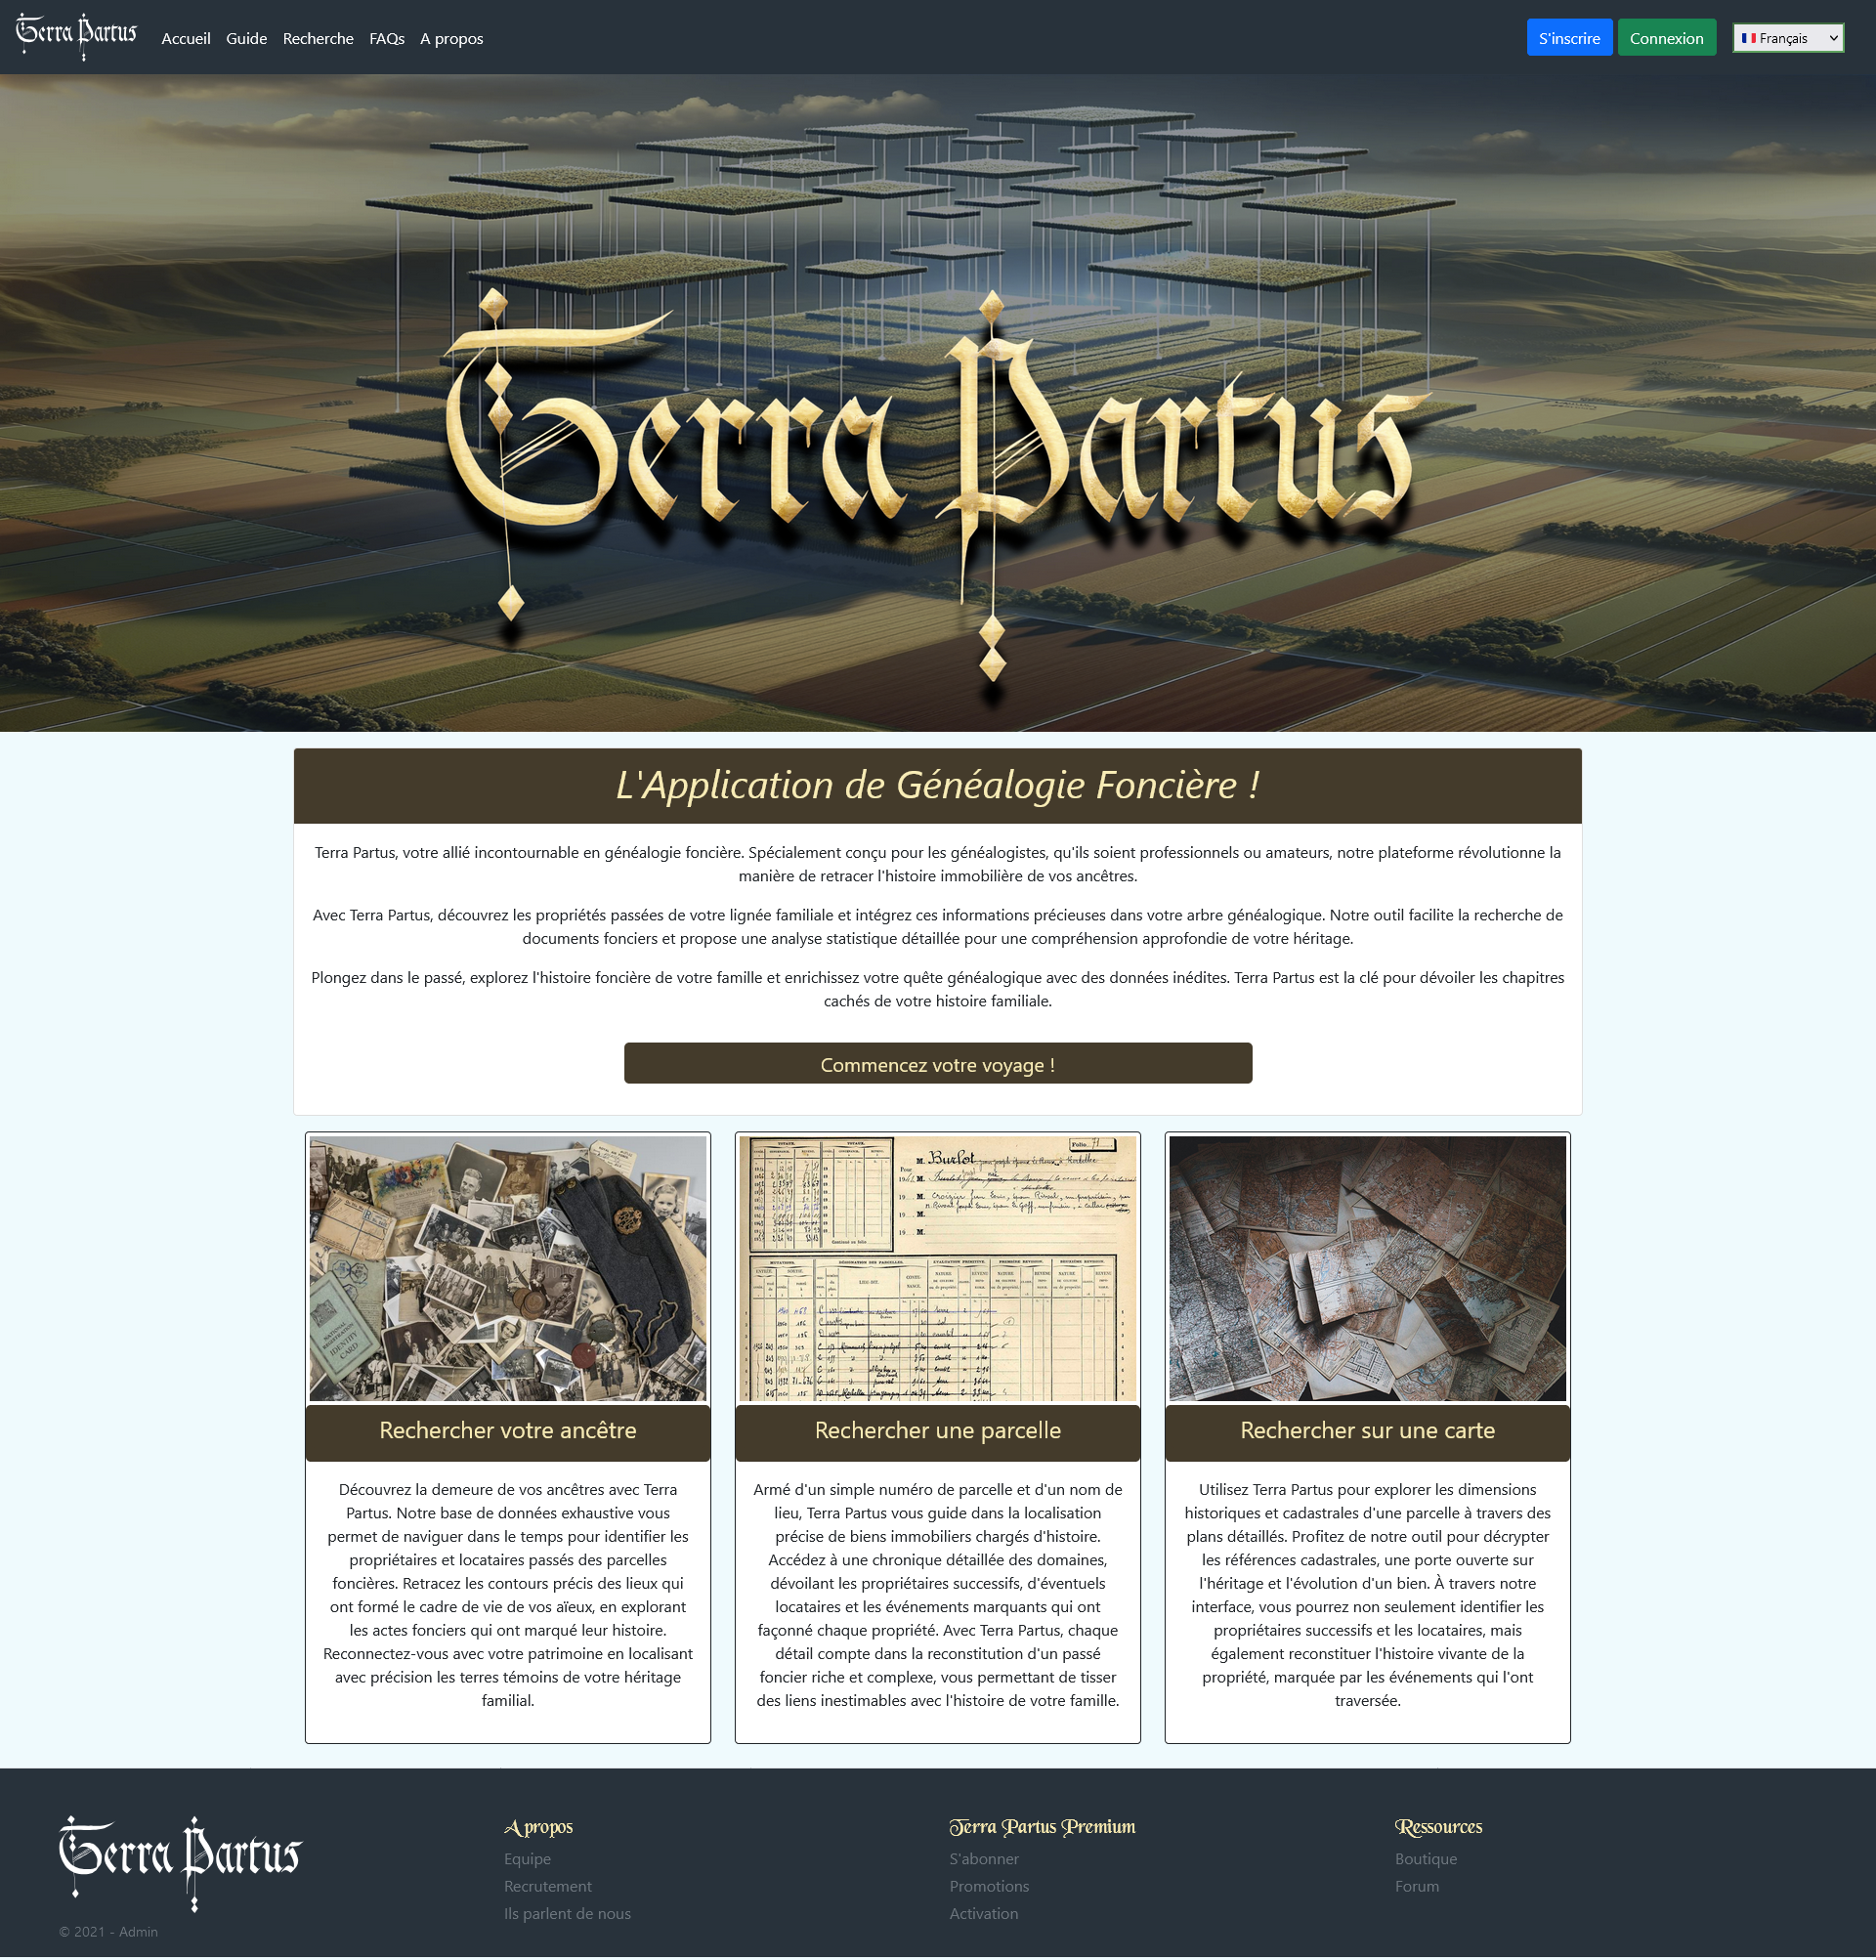
Terra Partus's home page greets you with a navigation bar at the top, where you can access different sections of the site, such as 'Home', 'Guide', 'Search', 'FAQs', and 'About'. This navigation bar is publicly accessible and allows easy browsing throughout the site. The home page itself provides an overview of the features and tools offered by Terra Partus, including land genealogy research and the exploration of family history.
Under the main heading, you will find a presentation section describing the benefits and objectives of Terra Partus, along with a button labeled 'Start your journey!' that lets you begin your search immediately.
The bottom of the page includes a footer offering links to other important sections such as 'About', 'Store', 'Forum', etc. These sections are also publicly accessible and provide additional information.
However, to access the main features of the application, such as ancestor search or parcel exploration, you need to create an account or log in to your existing account using the 'Sign Up' or 'Login' buttons located at the top right.

To create an account on Terra Partus, click on the 'Sign Up' button at the top right of the home page. You will be redirected to the registration page where you must fill in the following information:
- Email: Enter your email address to receive notifications and verify your identity.
- Username: Choose a unique username that will identify you on the platform.
- First and Last Name: Enter your first and last name to personalize your profile.
- Gender: Select your gender (Mr., Mrs.).
- Password: Create a secure password to protect your account.
- Password (confirmation): Enter your password again for confirmation.
Fill out the registration form
Once the form is completed, click on the blue 'Sign Up' button to validate your registration. If you already have an account, use the green 'Login' button at the bottom of the form to log in.

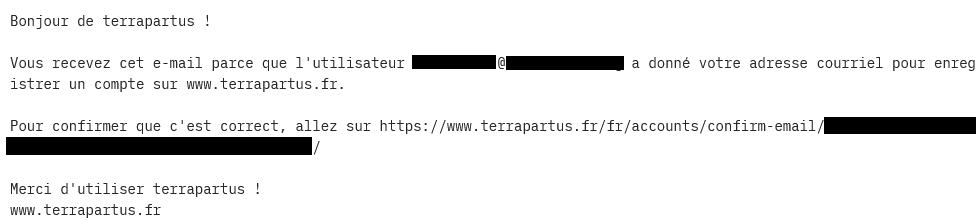
Receiving the confirmation email
After submitting your registration, you will receive a confirmation email. If you haven't received it, check your spam folder. The email contains a link that must be validated within one hour to activate your account.
Notification to the administrator
Simultaneously, a notification email is sent to Terra Partus administrators asking them to approve your registration. This process ensures that the information provided by the user is verified and meets our requirements.

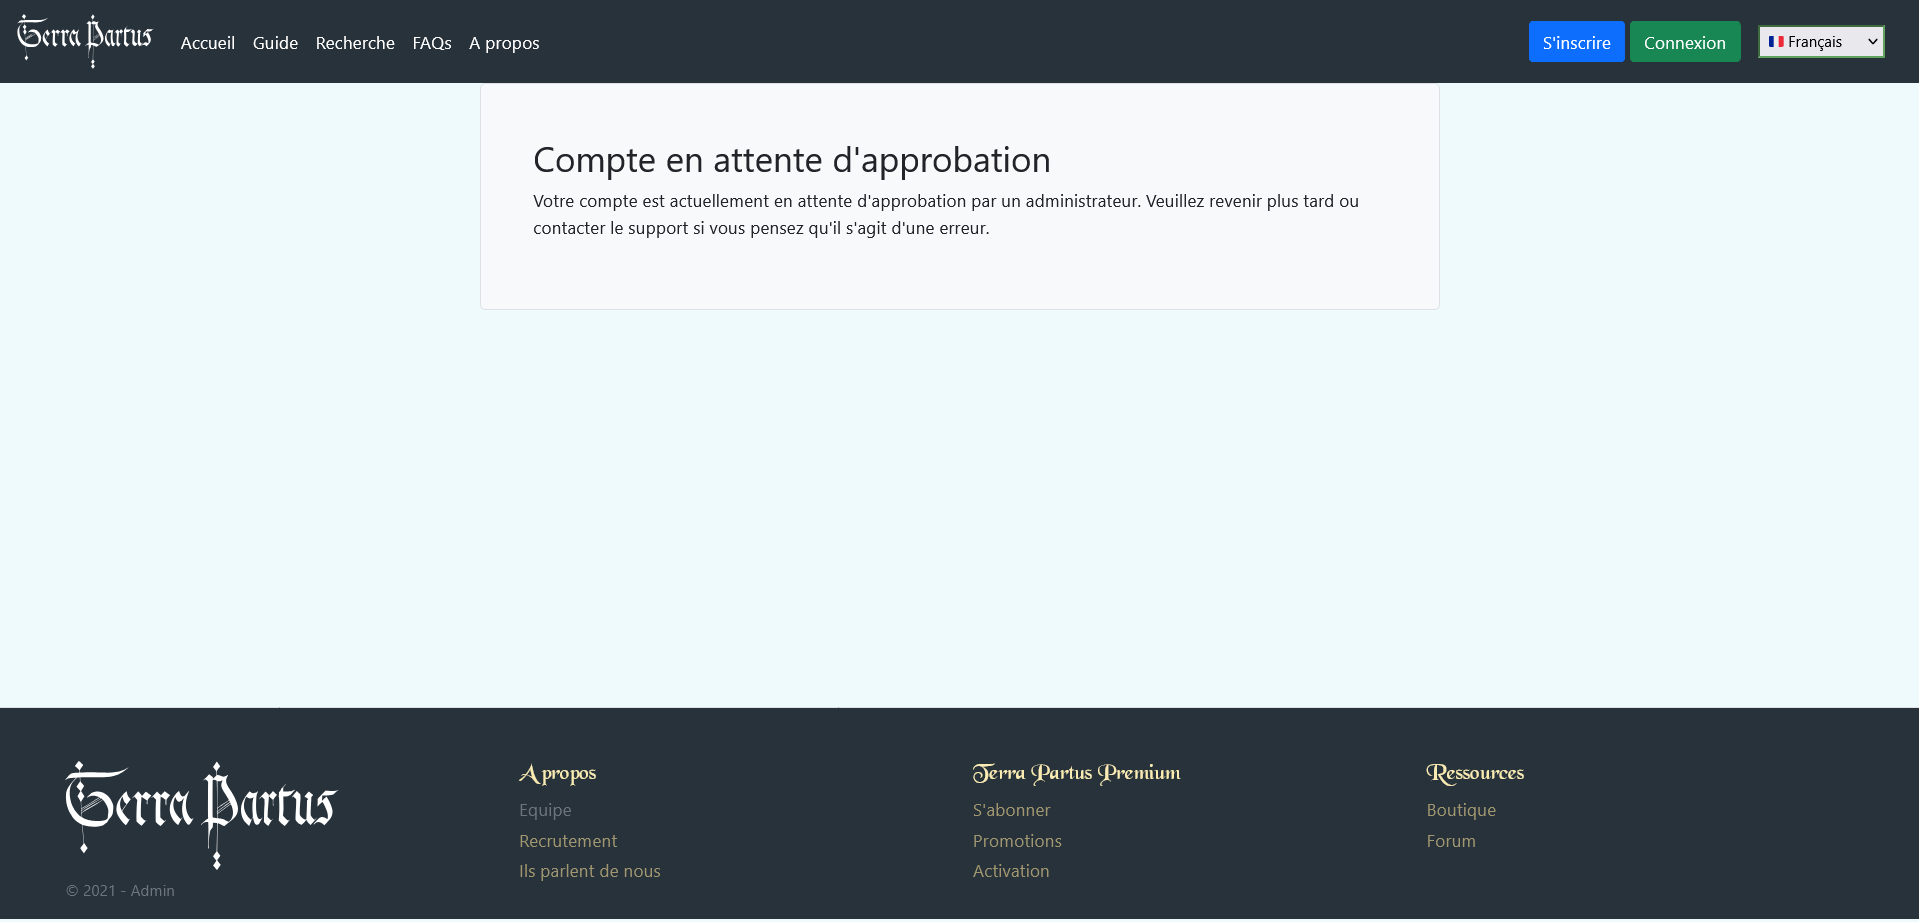
Manual validation by the administrator
It is important to note that approving your registration requires manual intervention by an administrator. In the meantime, you will be redirected to a 'waiting page' informing you that your account is being validated.
Access once approval is granted
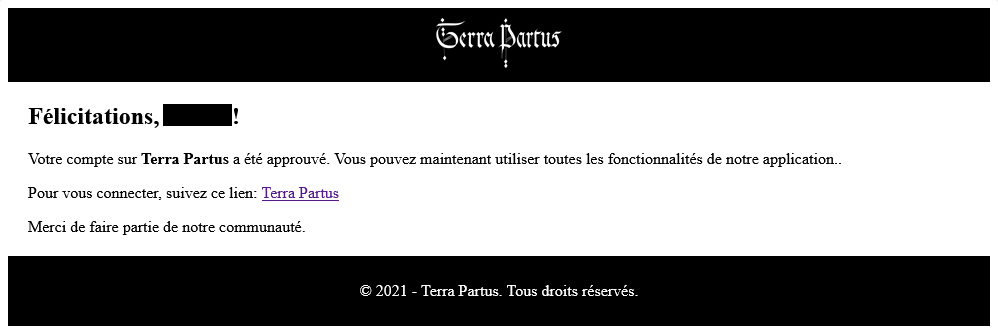
Once the administrator has approved your registration, you will receive an email informing you that your account is now active. You can then log in to the platform using your credentials.
Your dashboard
Once logged in, you will be redirected to your dashboard. This space is your starting point for exploring Terra Partus's main features, such as land genealogy research, parcel consultation, and access to historical documents.
To log in, click on the 'Login' button at the top right of the home page. You will be redirected to the login page where you must enter your credentials.
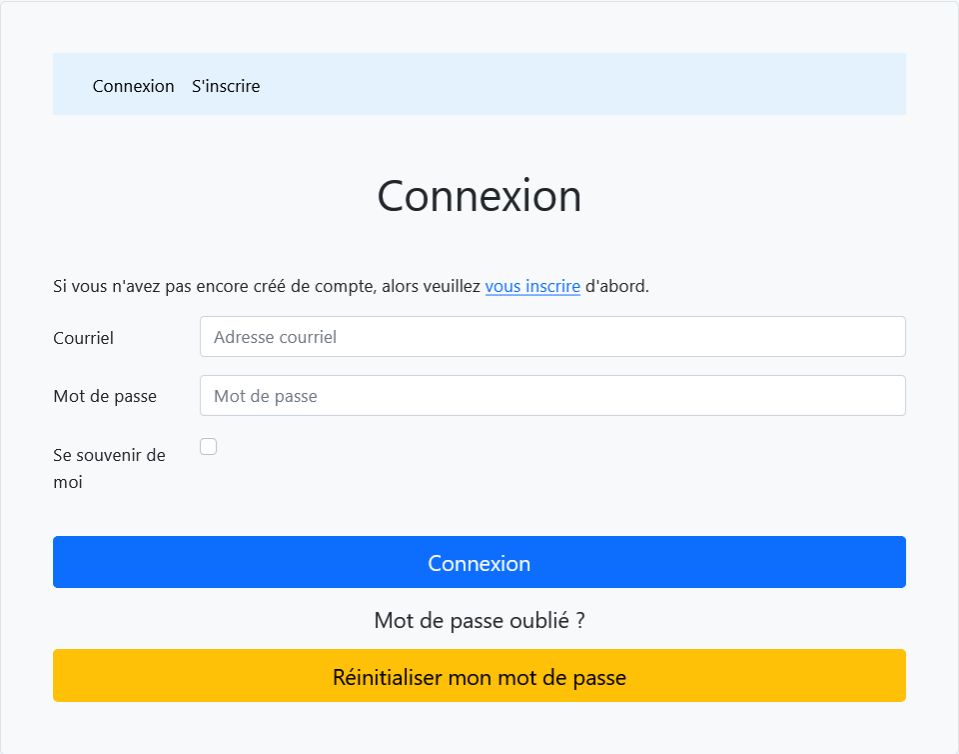
You can check the box to keep your session active longer. If you have forgotten your password, you can reset it by clicking 'Reset my password'.
1. Reset Request
On the login screen, click 'Reset my password'. You will be redirected to a page where you must enter your email address. Once the email is entered, click on the green 'Reset my password' button.
Note: If you encounter difficulties during this step, please contact us for assistance.

2. Confirmation of email sending
After requesting the reset, a confirmation message will appear. It will inform you that an email has been sent to you. If you do not receive this email, check your spam folder. If after a few minutes you still cannot find it, contact our support for assistance.

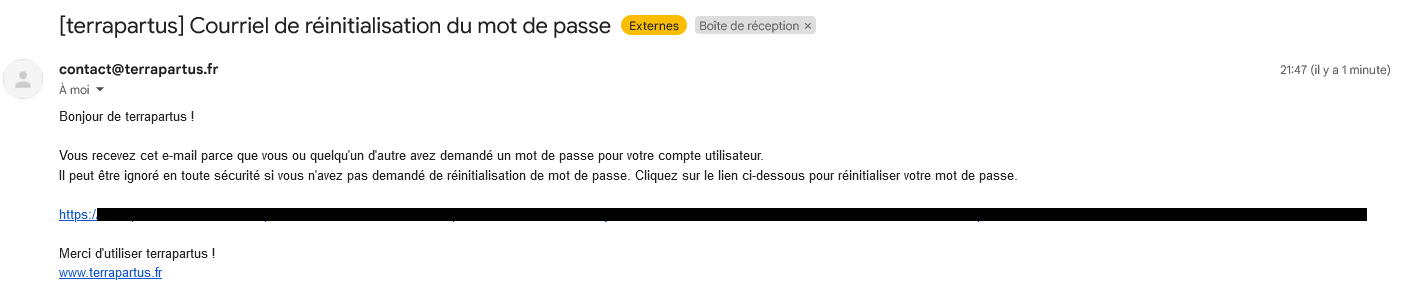
3. Receiving the reset email
Check your inbox for an email sent by our service (for example: contact@terrapartus.fr). This email will contain a password reset link. Click on this link to continue the process.
Important: If you did not request the reset, simply ignore this email.
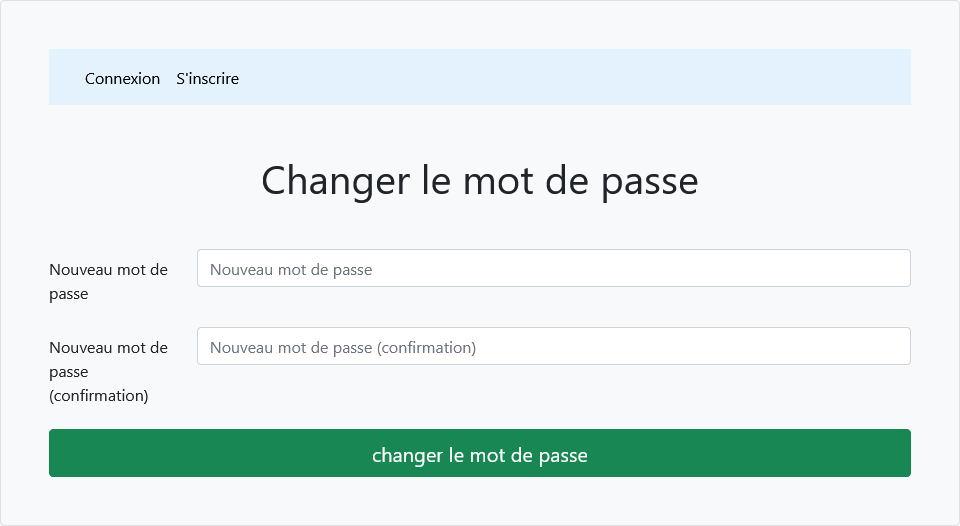
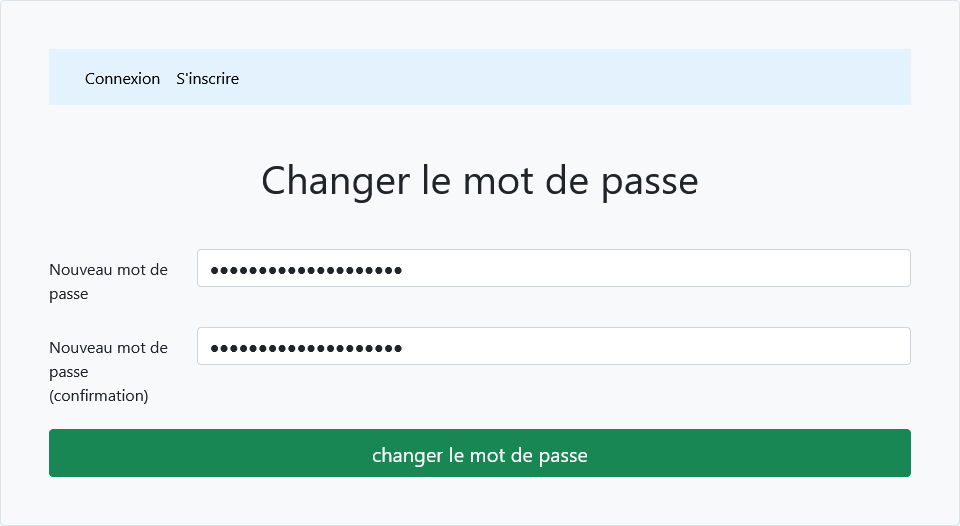
4. Entering the new password
After clicking on the link in the email, you will be redirected to a page where you can set a new password. Enter the new password in both fields ('New password' and 'Confirm new password'). Then click 'Change password' to apply.
Tip: Choose a secure and unique password to protect your account.
5. Confirmation of the password change
Once your new password is validated, a confirmation message will appear, indicating that the change was successful. You can now use this new password to log in to your account.
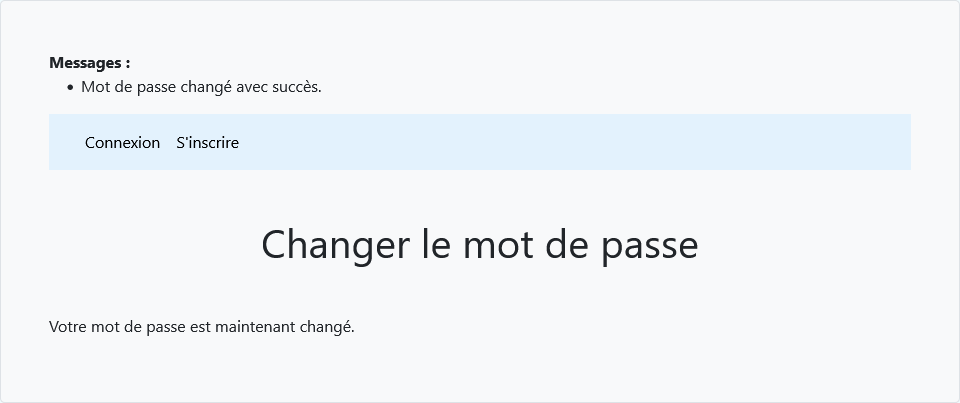
You can now log back into your account
Welcome to the main page of the Terra Partus application! This interface brings together the main features for exploring and managing your land and genealogical data. Below, you will find a detailed description of each section visible on this page.
This main page is designed to provide a clear and intuitive overview of Terra Partus's features. Each section is easily accessible via consultation buttons, and the side and top navigation bars allow for smooth exploration of the application.

Notification banner
At the top of the page, you will find a notification banner. Terra Partus informs users that the application is still in beta and that they can report bugs by clicking the 'report' link. It also mentions that regular updates are made based on user feedback.
A 'More Information' button allows you to access additional details on new features and recent changes.

Welcome message
A large central banner displays a warm welcome message: 'Welcome to Terra Partus!' This indicates that the user is successfully logged into their account.

Main dashboard
The dashboard is the central element of this page. It is organized into several categories that allow you to easily navigate between the different resources available in Terra Partus. Each category provides a quick overview of the data, with a 'Consult' button to access details.
Parcels
- Total : Displays the total number of parcels of all types (master, abutting, cadastre, subordinate) belonging to the user.
- Master : Displays the number of master-type parcels
- Subordinate : Displays the number of subordinate-type parcels
- Abutting : Displays the number of abutting-type parcels
- Cadastre : Displays the number of cadastre-type parcels
- Connected : Displays the number of parcels connected to the cadastre
You can view all data related to parcels by clicking the blue 'Consult' button.
Sources:
- Total : Displays the total number of sources
- Publicly shared : Displays the total number of sources the user has shared with the community
- Shared with you : Displays the total number of sources shared by the community
- Publicly editable : Displays the total number of sources the user has shared in editable mode
The 'Consult' button redirects you to the sources section to explore and manage these documents.
Media
This section allows you to access various media associated with your land or genealogical heritage, such as images, videos, or files.
- Total : Displays the total number of available media.
- Publicly shared : Displays the number of media publicly shared by the user.
- Shared with you : Displays the number of media shared with you by other users.
- Publicly editable : Displays the number of media you have shared that are editable by the community.
Click 'Consult' to explore all available media.
Genealogies (webtrees)
- Total individuals : Displays the total number of individuals in your genealogical trees.
- Total trees : Displays the total number of genealogical trees you manage.
- Public collaborative trees : Displays the number of available public collaborative genealogical trees.
- Trees shared with you : Displays the number of trees that other users have shared with you.
The 'Consult' button allows you to access the management and visualization of your genealogical trees.
Individuals
- Total : Displays the total number of individuals recorded in your genealogical database.
- Publicly shared : Displays the number of individuals you have publicly shared with the community.
- Shared with you : Displays the number of individuals that other users have shared with you.
- Publicly editable : Displays the number of individuals you have shared that are publicly editable.
Click 'Consult' to view and manage your individuals.
Events
- Total : Displays the total number of events in your database.
- Civil marriage : Displays the number of events related to civil marriages.
- Burial : Displays the number of events related to burials.
- Birth : Displays the number of events related to births.
- Baptism : Displays the number of events related to baptisms.
- Death : Displays the number of events related to deaths.
The 'Consult' button redirects you to the management and exploration of events.
Maps
- Your maps : Displays the geographic maps you have created or saved.
- Ongoing communes : Displays the maps of communes that are currently being processed.
- Available Maps : Displays all the geographic maps available in your database.
- Available communes : Displays the communes for which maps are available.
By clicking 'Consult', you can access the management of your maps and geographic data.
Notaries
This section allows you to view data related to notaries recorded in your database, including their deeds and legal transactions.
Click 'Consult' to explore the information related to notaries.
Sidebar
On the left side of the page is a sidebar navigation that allows you to quickly access the main features of the Terra Partus application. This bar remains visible as you navigate, providing instant access to your data and services.
Sections of the sidebar:
- Maps : Direct access to your maps and geographic data.
- Data : Access to parcels, sources, individuals, events, and notaries.
- Services : Management of your genealogy and personal maps.
- Statistics : Section reserved for data analysis.
Top navigation bar (nav bar)
The top navigation bar, located at the top of the page, allows you to access several important features and manage your account.
Sections of the nav bar:
- Search : A global search field to look for specific items.
- Online maps : Access to online maps.
- Online register : Consult a register of archived events.
- Community : Community space to interact with other users.
- Help : Section dedicated to assistance and tutorials.
- Language : Change the interface language.
- User profile : Access to account management and logout.

The Terra Partus sidebar is a convenient interface that allows easy navigation between different sections of the application. Each category is organized hierarchically for quick access to all the data, documents, and services offered. This menu remains visible on the left side of the screen as you browse the application, providing instant access to the most important functions.
The sidebar is your main navigation tool in Terra Partus. It allows you to quickly access all essential features, whether it's managing maps, genealogical data, or documentary series. Use it to effectively explore and manage all the resources the application makes available to you.
The horizontal navigation bar's toggle button allows you to retract the sidebar for better visual comfort as needed. 
General usage
The sidebar is designed for intuitive use. Each section is organized so that you can easily find what you need. Here are some tips for using the menu effectively:
- Quick navigation: By clicking on any item, you immediately access the corresponding section without losing your position in the application.
- Sub-menus: Some menu items are accompanied by a small arrow (chevron) symbol This indicates that there are sub-menus or additional information to explore. Click the arrow to expand or collapse these subsections.
- Hierarchical structure: The menu is organized by priority and logical usage. The most frequently viewed sections, such as maps or data, are located at the top, while more specific tools, like documentary series or statistics, are found at the bottom.
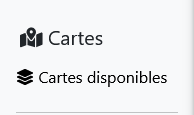
1. Maps
The first section of the menu is dedicated to the maps available in Terra Partus. Under the section Maps, you will find the following item:
- Available maps: This option allows you to consult all the maps and cartographic documents processed and accessible in the application. Click on this item to explore available maps or create new ones.
2. Data
Under the section Data, you can access different types of data organized by category. Here are the available subsections:
- Sources: Click here to create and manage your archival sources and historical documents. These sources may be civil status documents, notarial records, or other archives.
- Individuals: Click here to create and manage individuals recorded in your genealogical database. You can add, edit, or consult information about people related to your genealogical tree or land genealogy.
- Parcels: This section allows you to create and manage land parcels in your land genealogy, patrimonial study, or local history. Click to view parcel details.
- Event: Here, you can create and manage genealogical or land-related events, such as marriages, births, deaths, or any other type of event.
- Notary: This option allows you to consult and manage notarial documents recorded in your application, including deeds and legal transactions.
3. Document integration - Currently under development
This section is dedicated to the online integration of digitized historical and legal document series. It brings together important document series classified by theme. The subsections include:
- Series: Feudalism, families, civil status, notaries: Click on this series to access documents related to noble families, civil status, and historical notaries.
- Census: Here, you can access census data, useful for genealogical or demographic research.
- Series: Finances, cadastre, and posts: This series includes financial, cadastral, and postal documents. It is essential for managing lands and properties.
- Series: Domains, registration, mortgages: This section contains documents related to land domains, property registration, and mortgages.
4. Services - Currently under development
The section Services allows you to manage your customized services within Terra Partus. It includes the following subsections:
- My genealogy: This tab gives you access to your personal genealogical trees. Here you can manage, view, and edit details of your family tree.
- My maps: This section allows you to manage maps you have created or those linked to your land and genealogical data.
- In the future, all external service-related features (requesting help, research, contacting a genealogist, requesting a parcel history from tax authorities, etc.) will be available here. The goal is to centralize services in one place.
5. Statistics - Currently under development
The section Statistics gives you access to data analysis and visualization tools in Terra Partus. Here, you can view charts, performance indicators, or detailed reports about your genealogical and land data.
The map menu
Access the maps by clicking on 'Available maps' in the sidebar.
The available maps page
On this page, you can directly view all ongoing cartographic work.

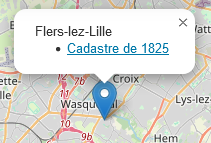
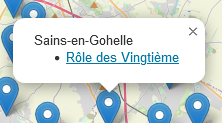
Popups
Each marker on the map shows the type of archive (cadastre, vingtième tax roll, etc.). Popups may contain cartographic sources, and when a map covers several communes, the marker will appear in each of these communes.
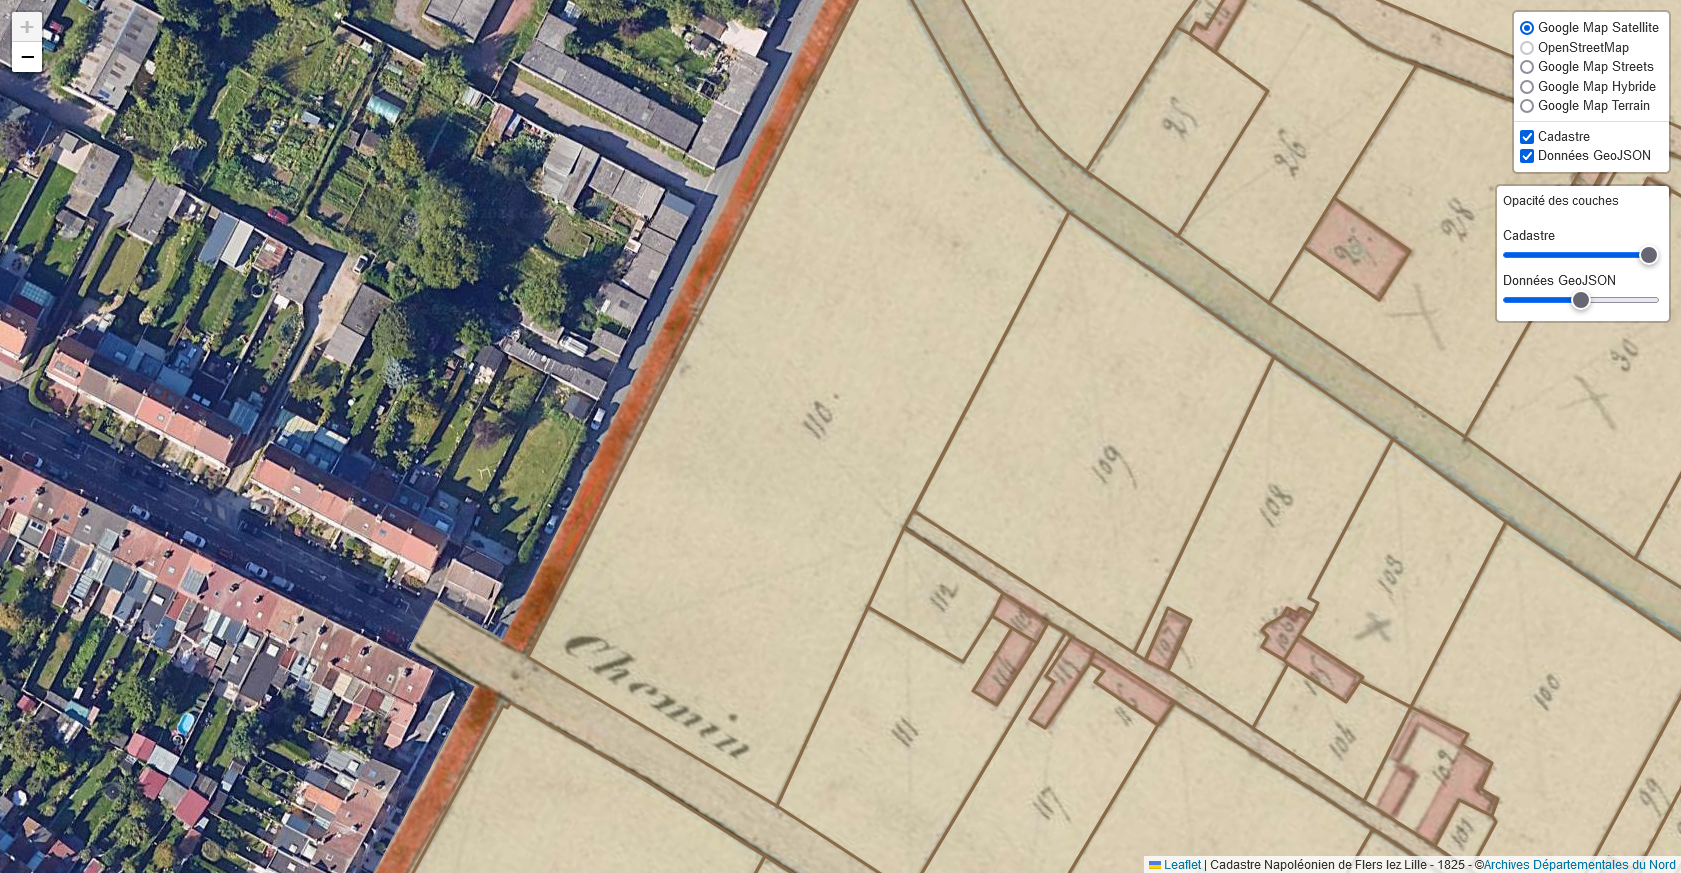
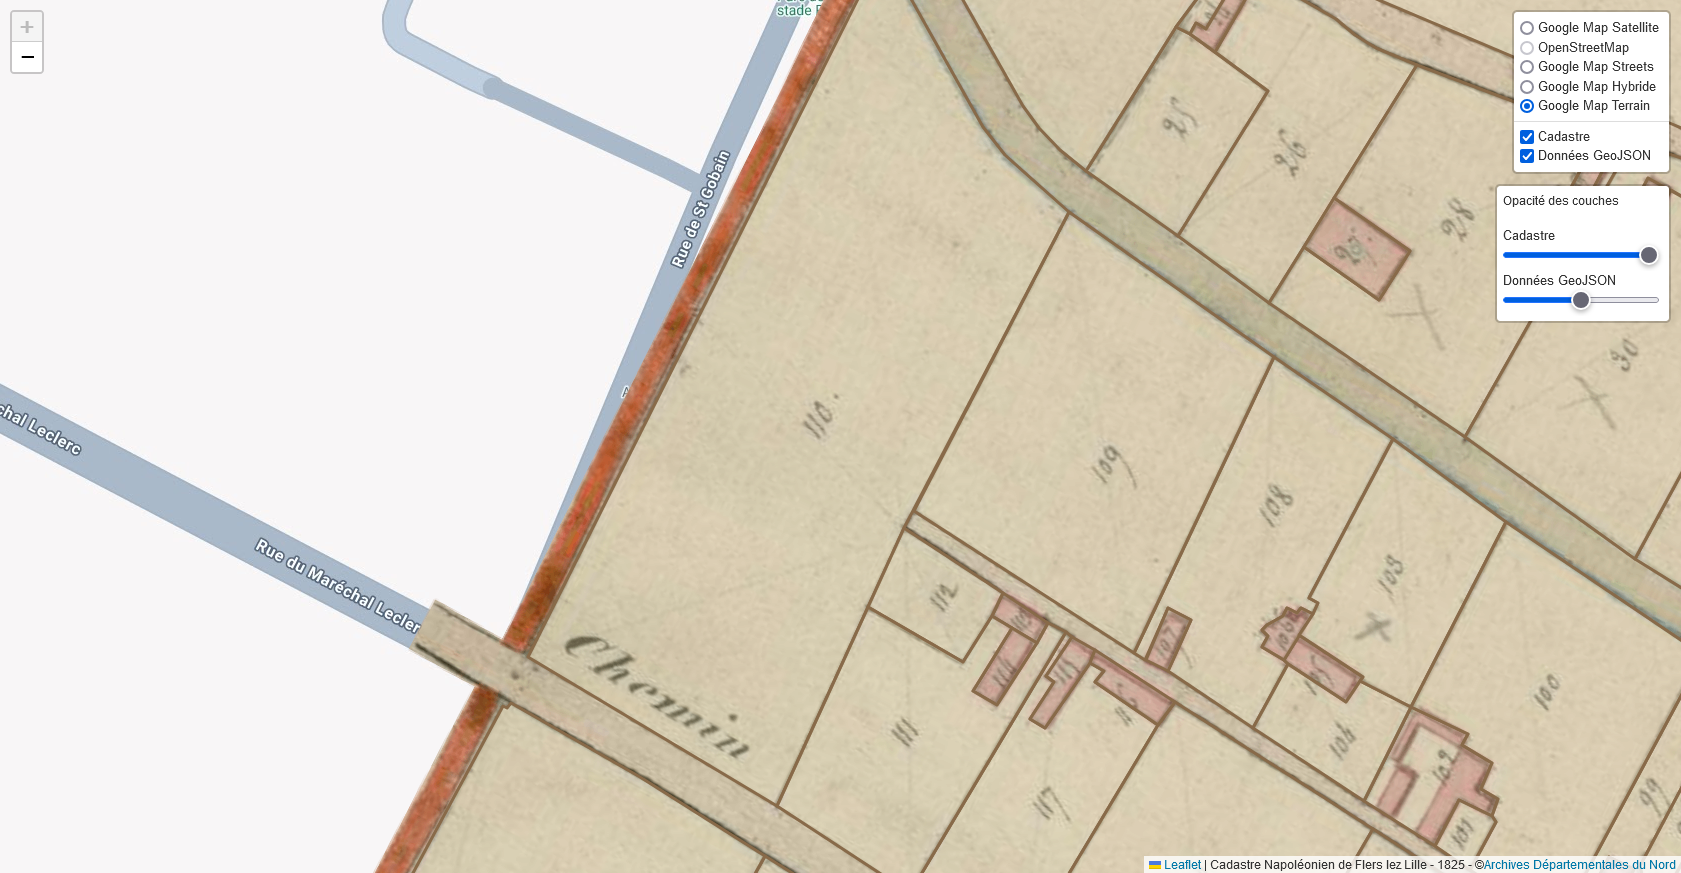
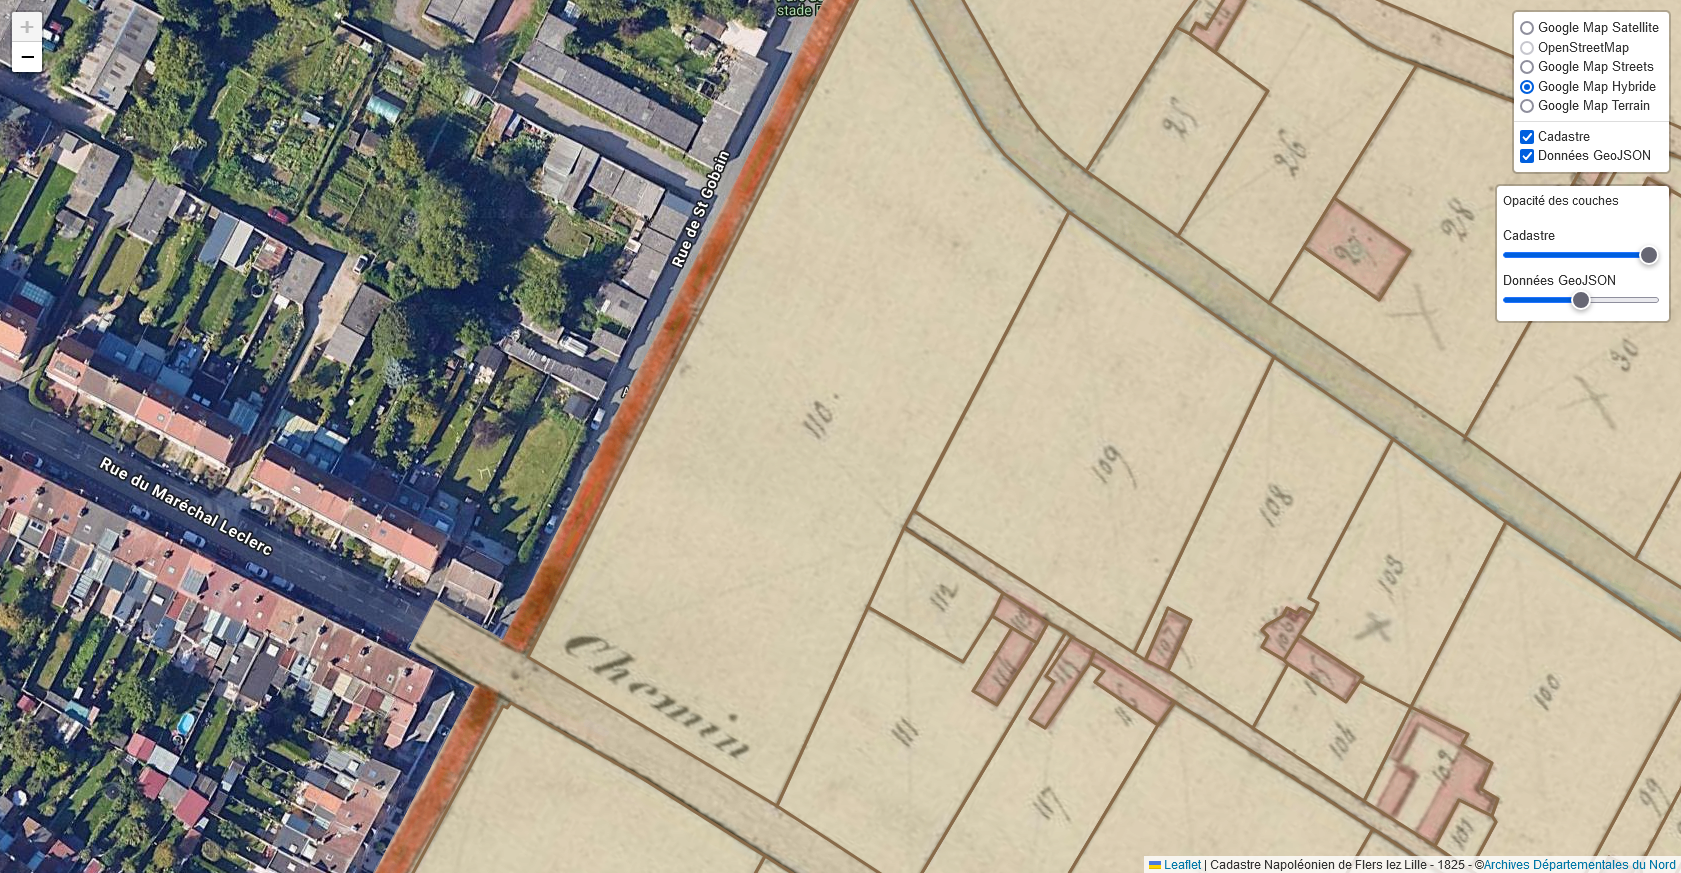
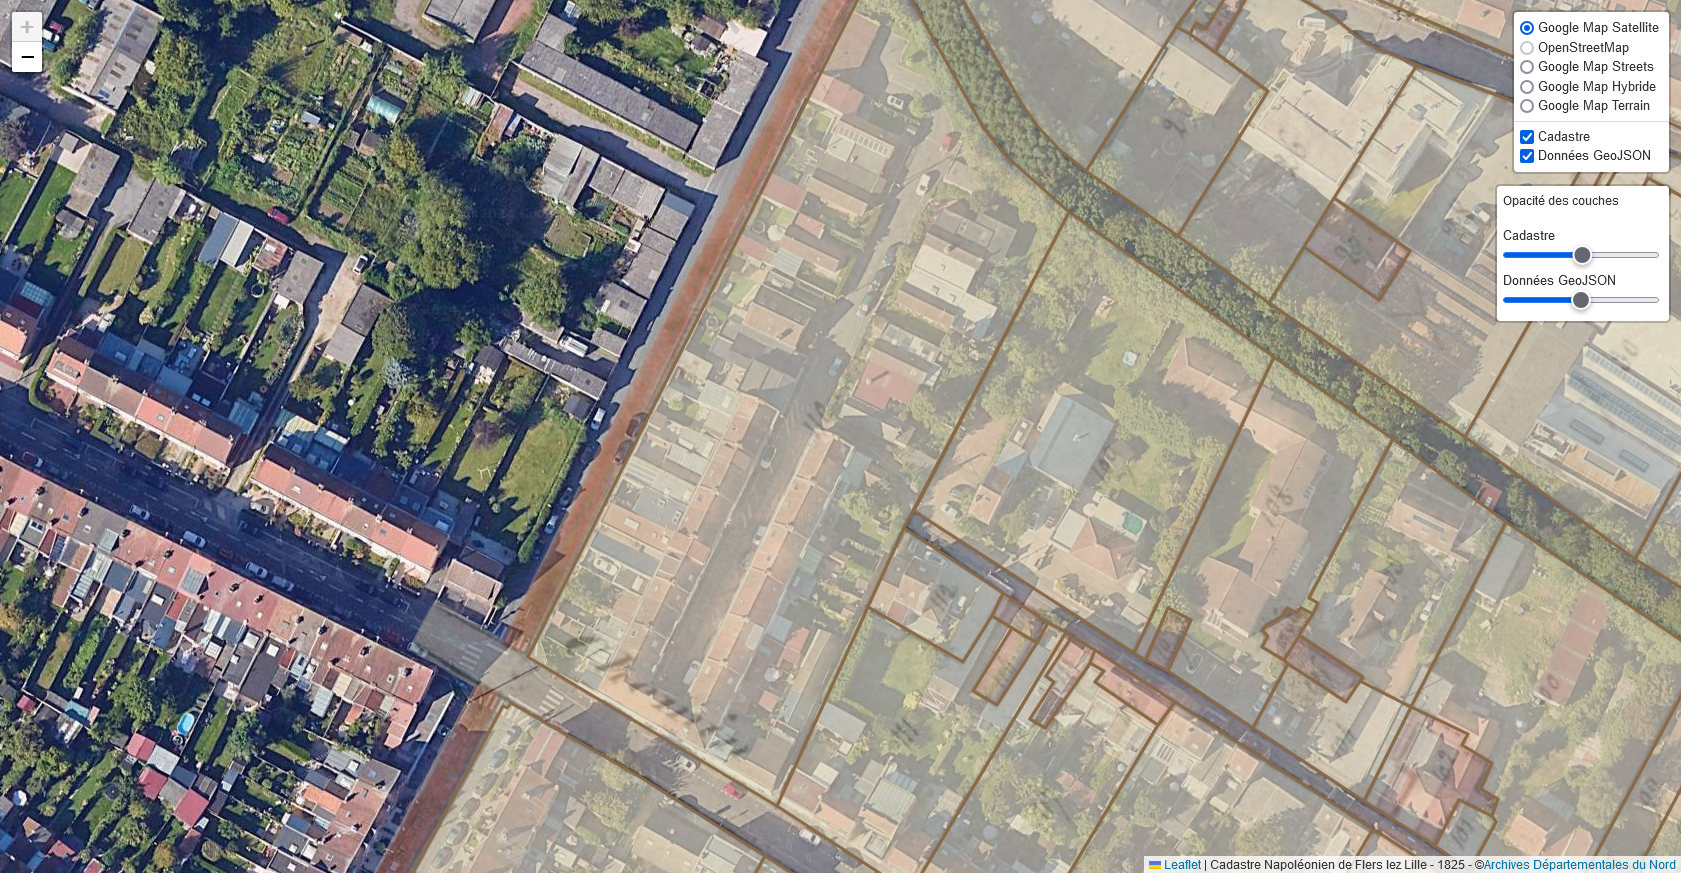
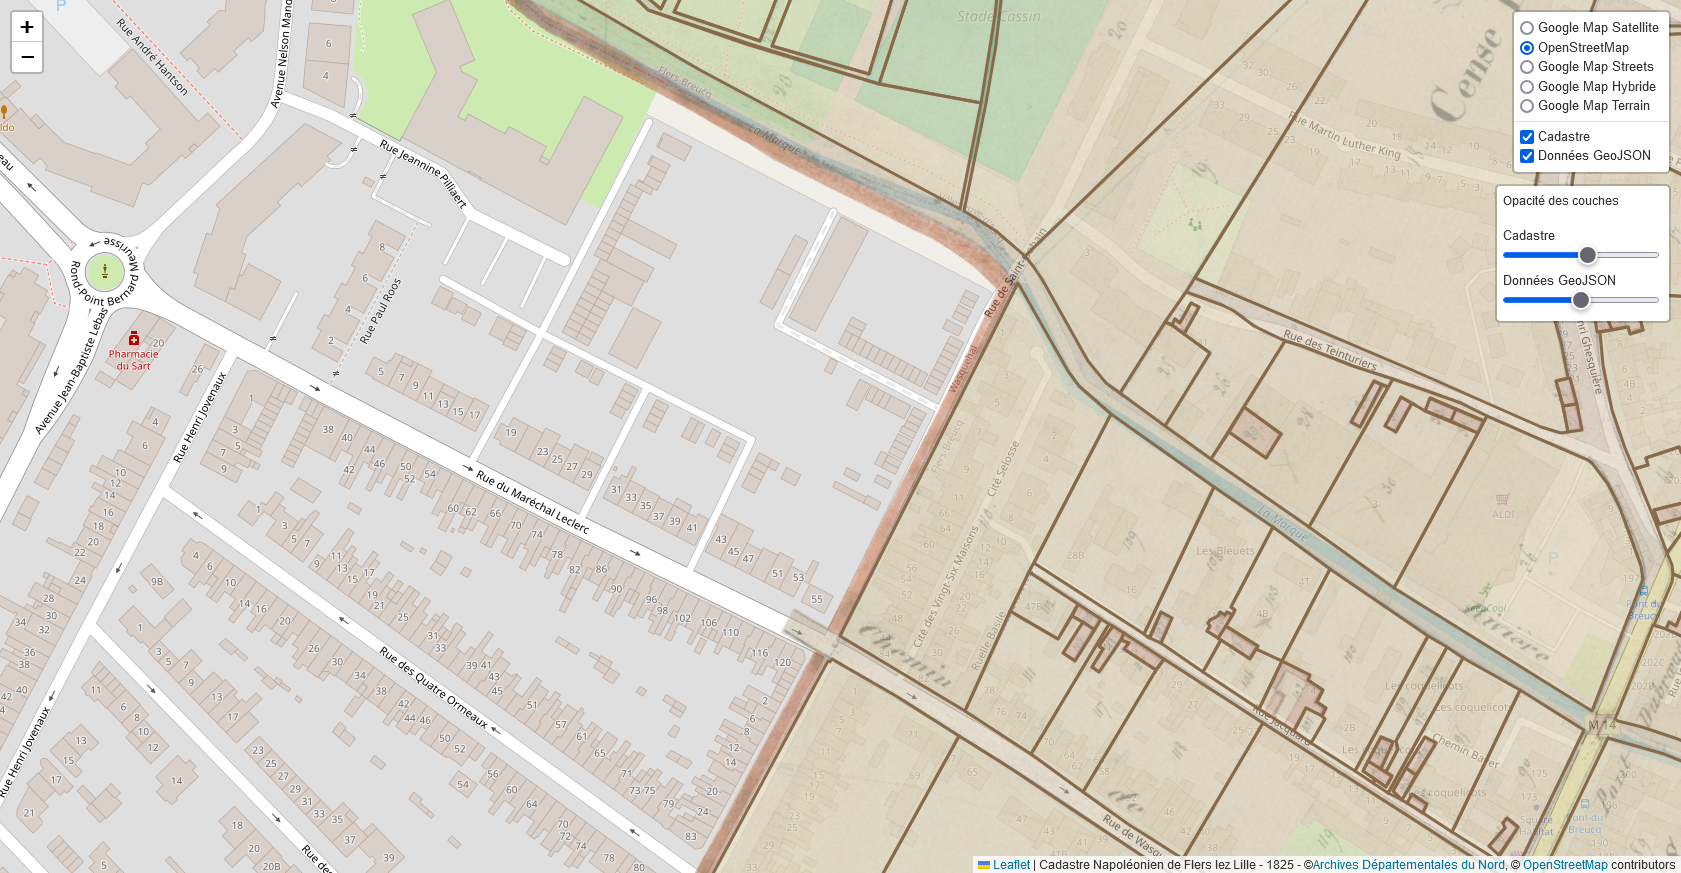
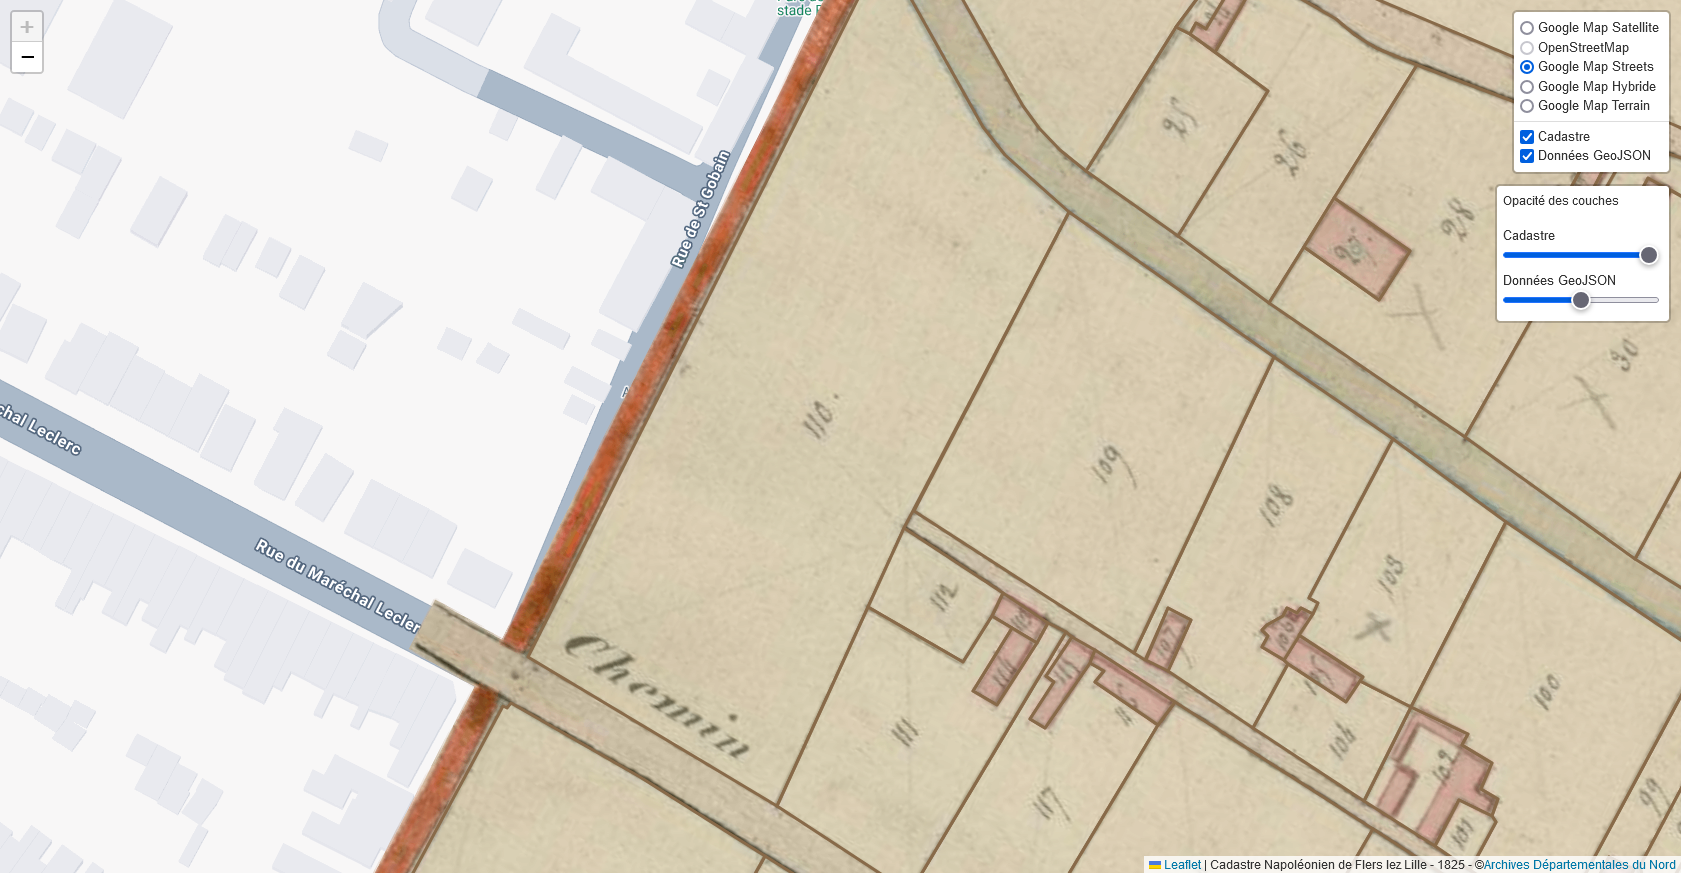
The map
Once the map is selected, you will have access to a page with control tools. These tools allow you to change the map background and adjust the map's transparency for better comparison between historical and current data.

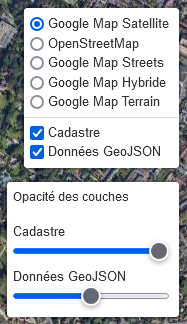
The controls
This section allows you to show or hide the map (image) as well as the cadastre's geometric shapes (Polygon, GeoJSON).
You can also change the map background to compare what it was before and what it has become today.

Map in progress
When a map is in progress, you will see a progress bar indicating the status of the work.
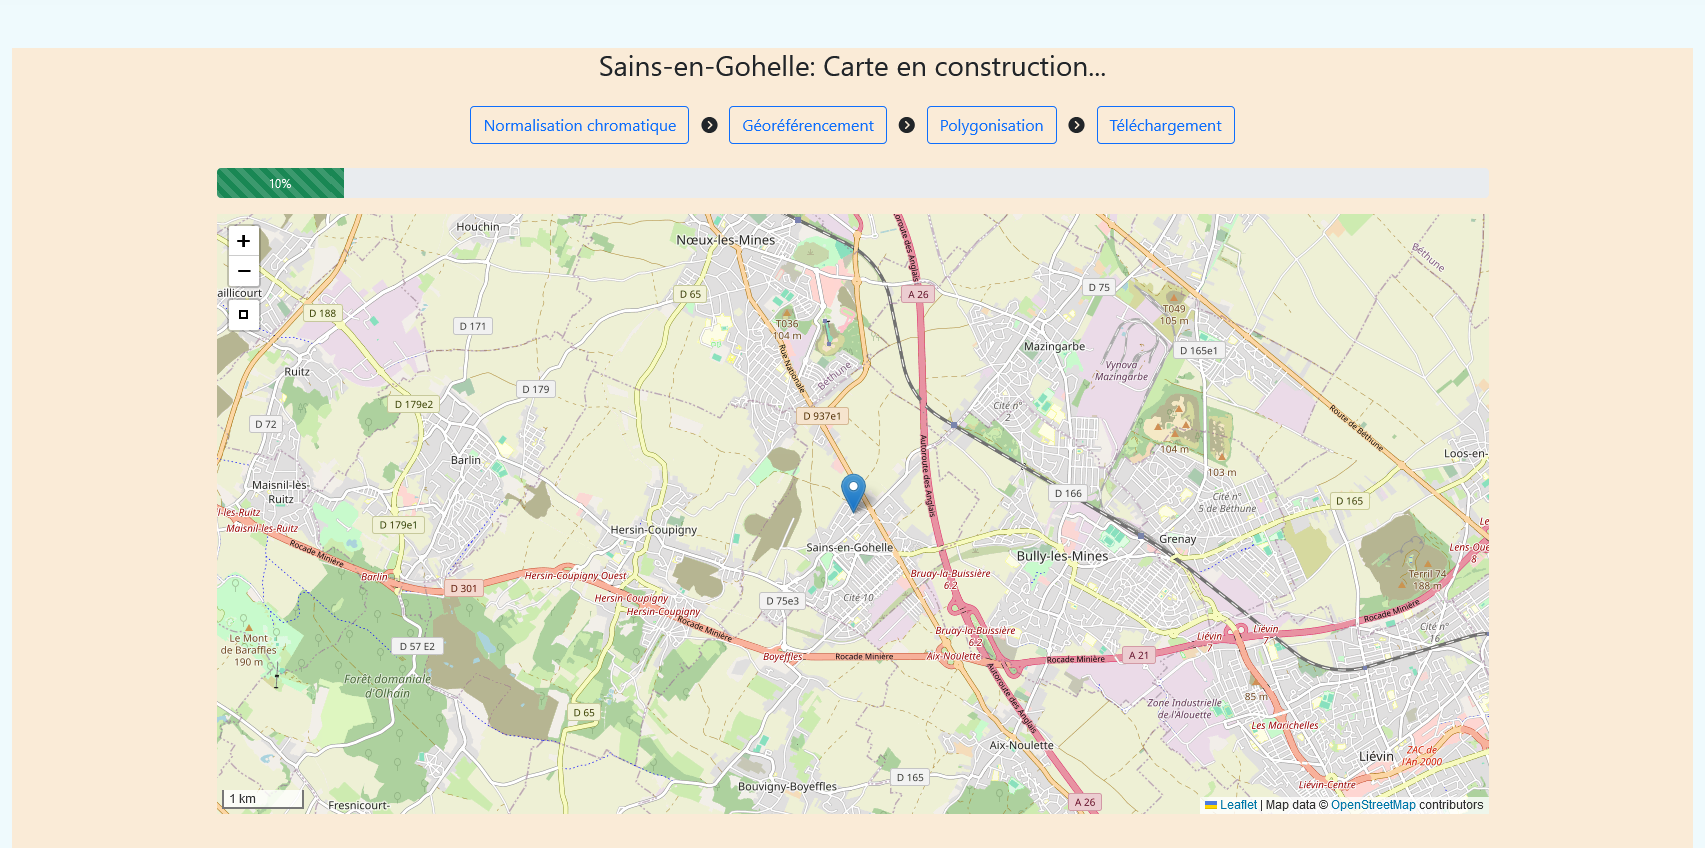
For a map to be put online, it must go through five steps:
- Digitization of the map:
If the map is not already digitized, it must be done at the highest possible resolution.
- Chromatic normalization:
Once digitized, the map is normalized to balance contrasts and adjust colors.
- Georeferencing the map:
This step consists of aligning the digitized map with geographical coordinates (latitude, longitude) to match current plans. Certain deformations may be necessary to adjust the image.
- Vectorization of the map:
This step allows you to vectorize elements of interest such as roads, rivers, buildings, and especially land parcels.
- Putting the map online:
Once all these steps are completed, the map is ready to be put online and will be available on this page.
Conclusion:
Depending on the size, number of parcels, the condition and quality of the image, as well as any retouching, some maps may take from one week to several months to go online. We hope that with the advancement of artificial intelligence, some of these steps can be automated.
To offset this delay, a voting system will be implemented, allowing users to choose which map to prioritize for the week or month, depending on their needs. The ultimate goal is to vectorize the entire French cadastre.
An 'À la carte' service system could be offered for a fee, granting the user temporary exclusivity over a map. After this period, the map will be accessible to all users.
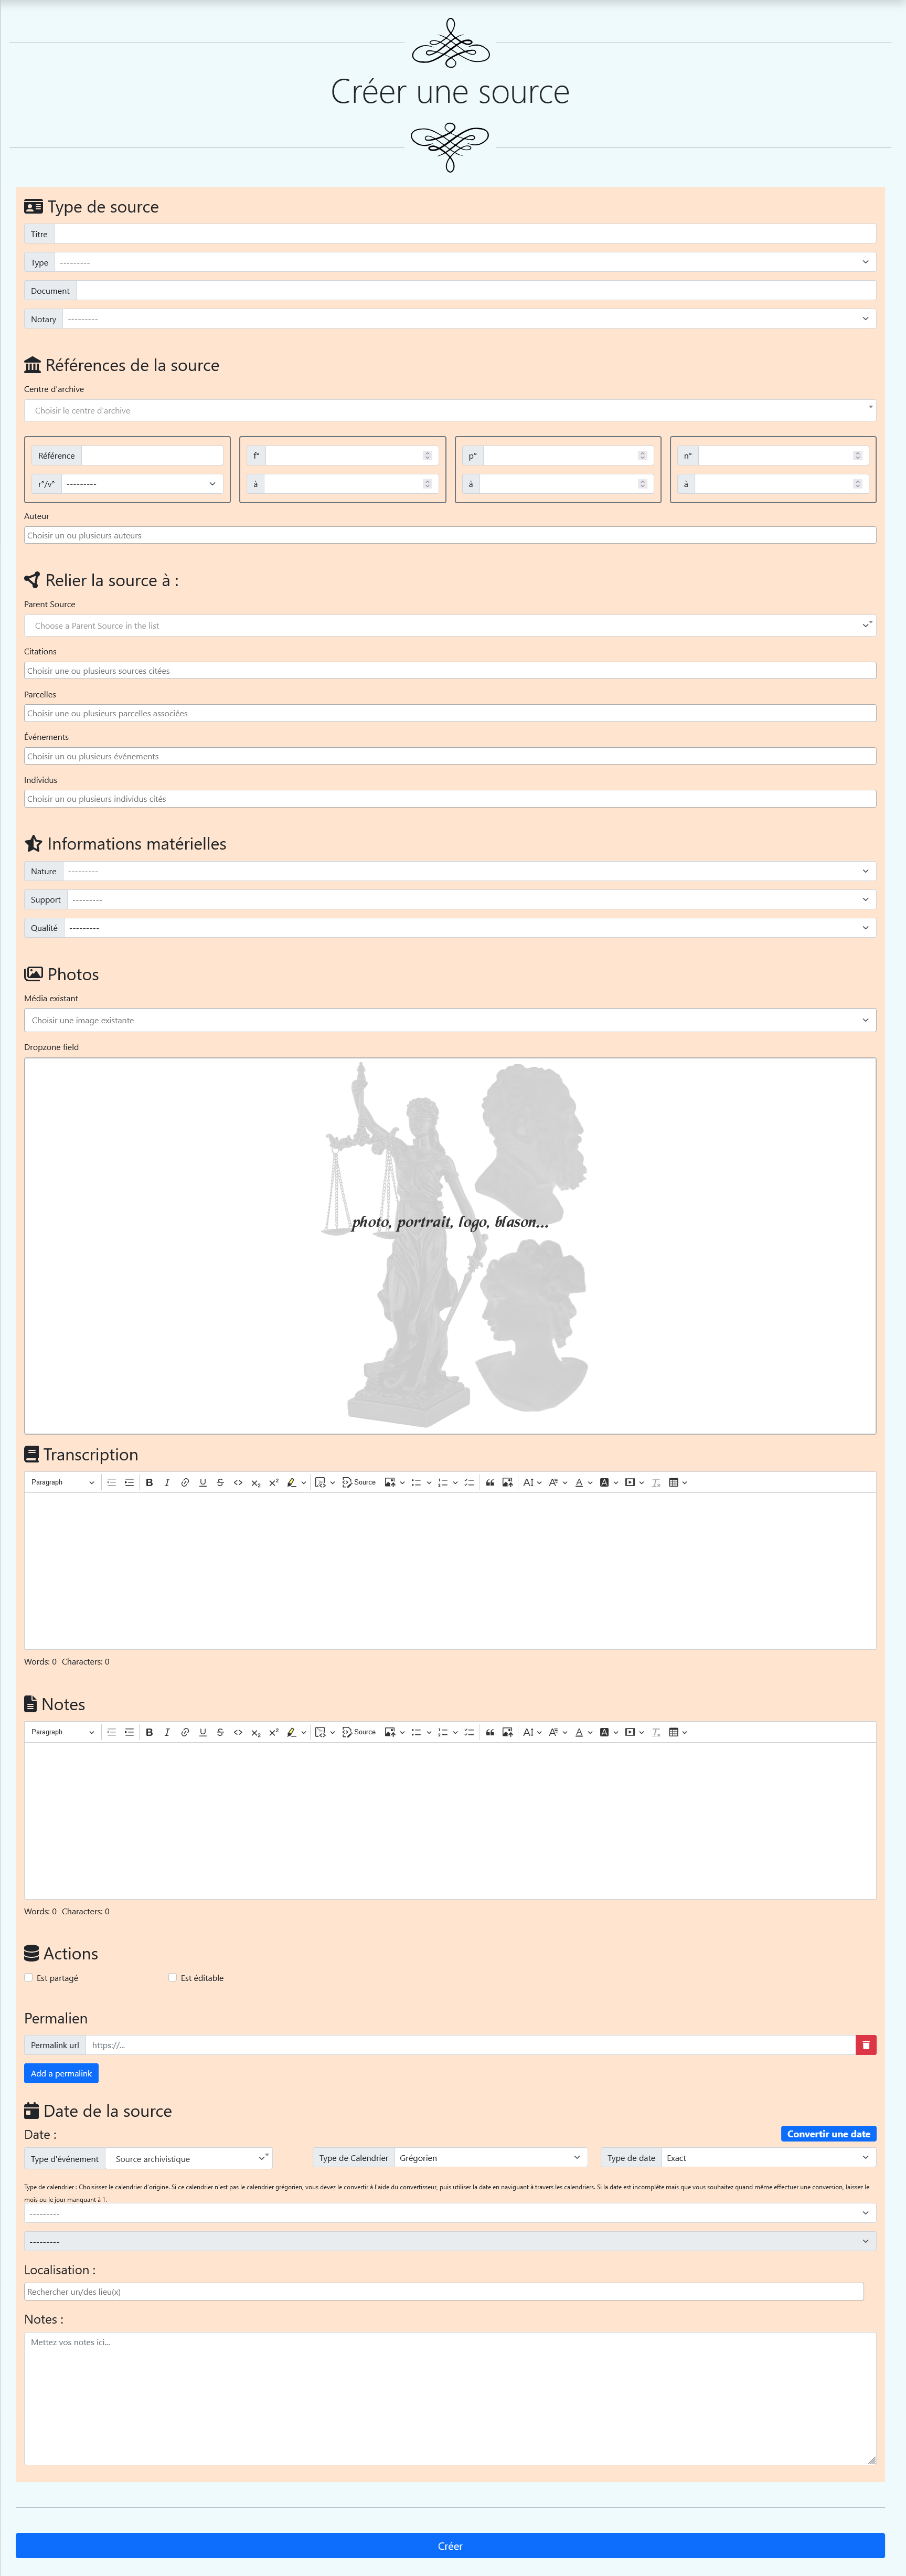
Create a Source
This is the first milestone, the foundational step that illuminates the origins and fuels everything else. The primary source, essential to all data, from which all integrated information in this application will flow. Particular care has been taken with this feature: the detailed and rich form is designed to capture the scope of the source itself, in terms of information and data. Nothing is missing to ensure nothing escapes us, whether in the content, the container, or the one who carries it.
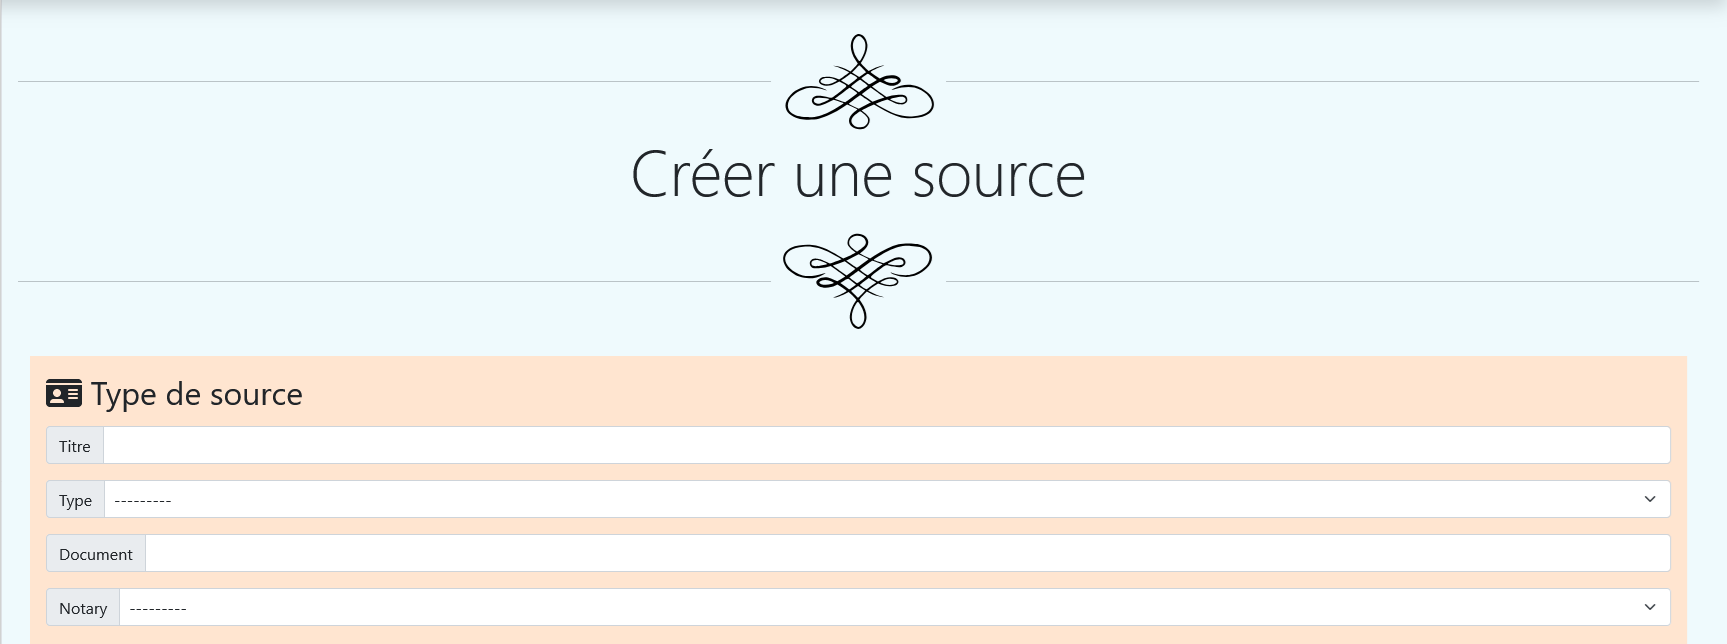
The 'Create a Source' page allows you to add archival documents or historical information, detailing their nature, location, and references. It is divided into several sections, each dedicated to a specific type of information.
Type of source
This section allows you to define the basic information of the document, including:
- Title: Descriptive title of the source.
- Type: Select the type of source (e.g., Deed, Register).
- Document: Main description of the document.
- Notary: Selection of the notary linked to the document, if applicable.
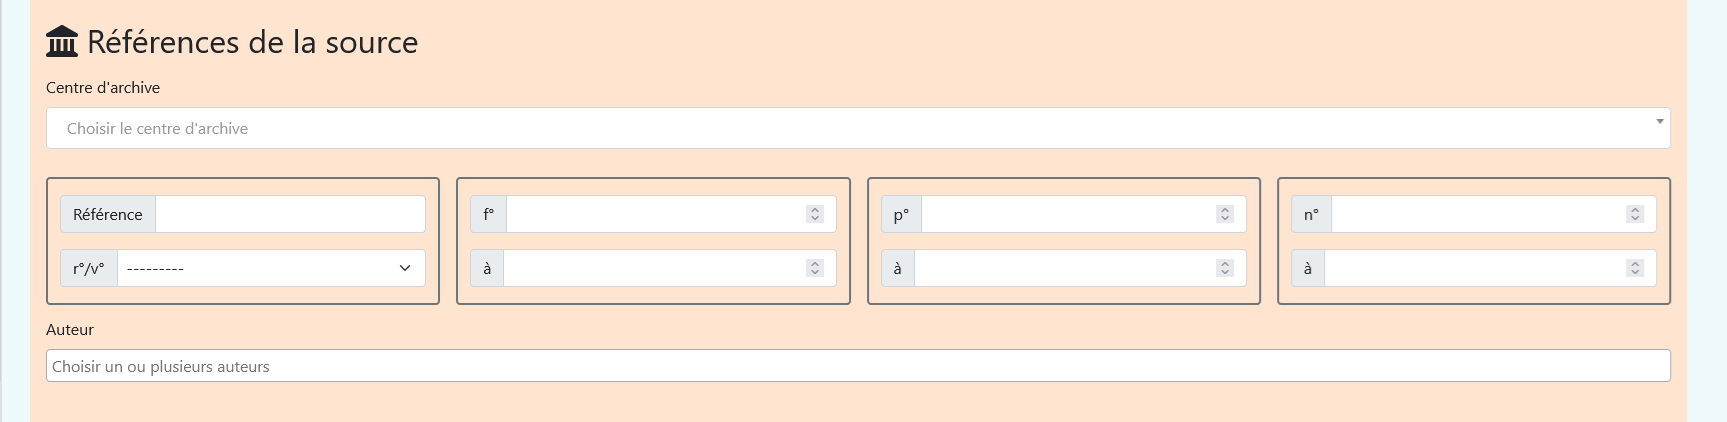
Source references
Here, the archival details are specified, with fields for:
- Archive center: Choose the archival location.
- Reference, Folio, Page, Number: Specific numbering of the document.
- Author: Select one or more associated authors.
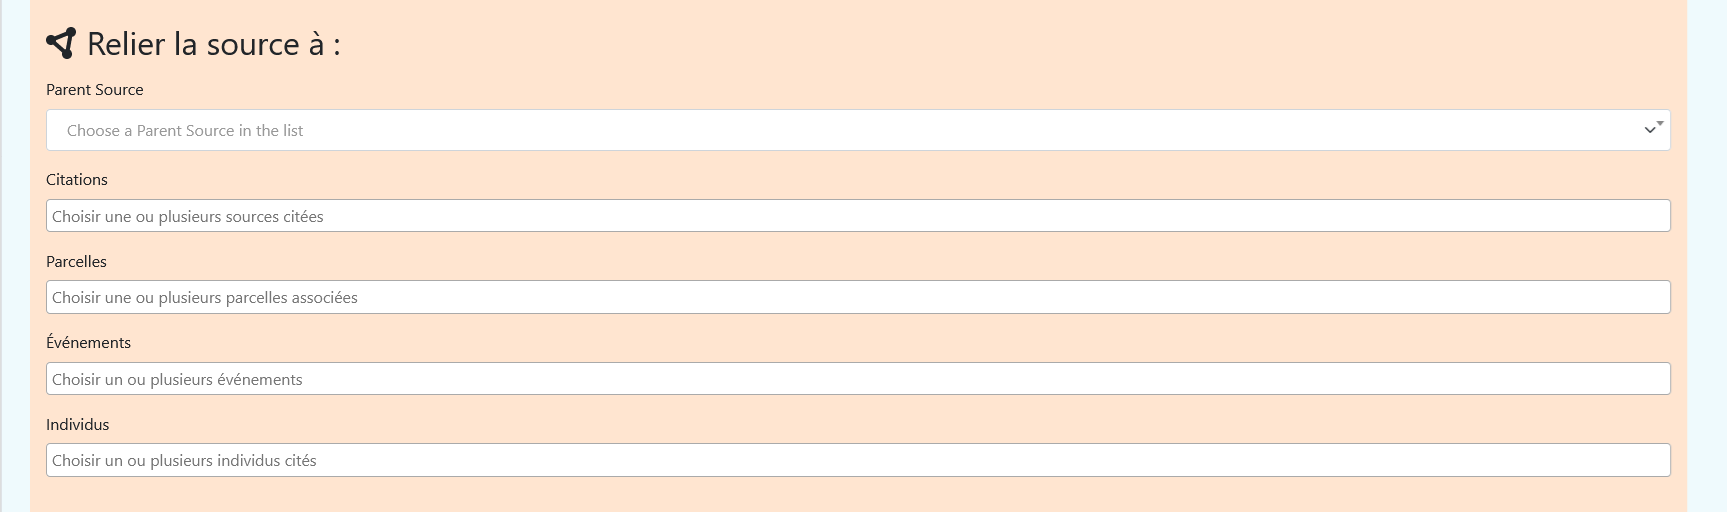
Link the source to
Associate the source with other entities such as:
- Citations: References to other documents.
- Parcels: Associated lands.
- Events: Relevant historical events.
- Individuals: People mentioned in the source.
Material information
Specify the type of medium (e.g., Original, Photocopy) and the quality of the document for archival standards.

Photos
You can add digital images via the Dropzone field or select an existing media.
Transcription
Insert a transcription of the document's content here, if available.
Notes
Use this space to add comments or additional information about the source.
Actions
Determine if the source is shared or editable by other users.
Date of the source
Specify the date of the event or document with calendar options (Gregorian, French Republican, etc.).
Create
Once all fields are filled out, click 'Create' to save the source.
Here is a screenshot of the 'Create a Source' page: